Jeep Build Phase 1 Complete

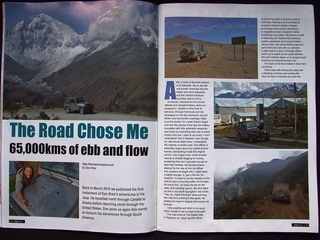
The Road Chose Me Volume 2 OUT NOW!!
The Road Chose Me Volume 2: Three years and 54,000 miles around Africa
I’m in the middle of an 8,000 mile road trip that comes before the 80,000 mile road trip of my dreams. There are so many modifications I want to make to my Jeep, I’ve split the work into three major phases.
I find a home in Calgary for 6 weeks, with my long-time friends Jamie and Ian. Ian has the best garage known to man, and the skills to back it all up. I can’t count how many times a little prod, or encouragement from Ian saved me a massive amount of work.
I spend many 10 hour days in the garage, slowly chipping away at everything I want to get done on the Jeep:
- Oscar and Reg rescue me from my non-existent welding skills, with Oscar welding in a very modified roll cage.
- I wire in a to wire all my electronics.
- I install a very solid steel
- I install in the entire floor of the Jeep, then cover it with lino for durability.
- I build a false floor and permanently mount a – I’m like a little kid with excitement when I set it a couple of degrees below freezing and there are little chunks of ice in my water bottles two hours later. I can’t believe how good it is to have a fridge on board.
- Using , lightweight and plywood, I make cabinets and a bench seat in the back of the Jeep to store all my stuff. The whole setup also converts to a sleeping platform when required.
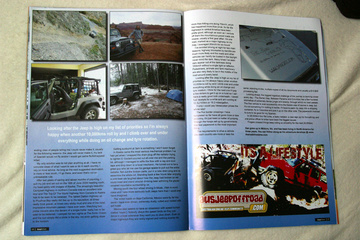
The reasoning and rationale for everything I’ve done, and will do, is now online in the new edition of JPFreek Magazine check it out to understand my madness.

After removing the backseat, carpet and trim

Reg cutting the roll bar – I was very hesitant and didn’t want to do it myself

The modified roll bar

Painless fuse block mounted
")
Heat and Sound insulation on the floor (under the front seats too)

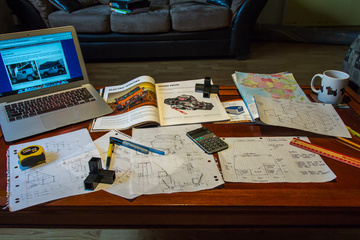
The design for the cabinets my Dad and I created.

Cabinet work in progress – I can easily pick these up with one hand

Right hand side complete

Cabinets finished, stacked as a kitchen bench

Converted to a sleeping platform

The sleeping platform and Dometic CFX-35 fridge
Huge thanks to my Calgary family: Melissa, Reg, Jamie, Ian, Oscar and the whole crew. The saying “I couldn’t have done it without you” has never been more true.
-Dan
P.S. Checkout my spread in JPFreek Magazine!

JPFreek Magazine spread – click to view magazine


This build is awesome! Congrats on making it happen. Hope our paths cross again soon.
Are you adding a camper type top? If not you may want to add some cross bracing to the cage. Or it will fold should you roll hard.
Yes, I’m getting a J30 pop-top roof from Ursa Minor Vehicles. , coming up in a month or so.
That’s Phase 3 of the build
-Dan
Top job Dan. It all looks very professional. Keep pushing the agenda. Keen to see it all finished. Dad.
Thanks Dad, I couldn’t have done it without our late night planning sessions back at the start of the year.
It turned out almost exactly like we planned – the only difference is that it’s all mirrored so the fridge is behind the passenger seat rather than the driver’s.
Thanks for all the help and input!
-Dan
It is very nice. Thank you dan for telling us about your trip
Looking awesome Dan!
Hi Dan,
I love what you’re doing, but from a safety standpoint cannot stress enough that your cage is NOT structurally sound and if you should roll, you are going to have a big problem on your hands.
The way the pipe was just welded end to end is a huge weak point and will fold very easily. Additionally, the rear cross bar will probably just tear off since it is not between the two sides that would be bearing the load. Lastly, it needs to be reinforced. Have you ever built a wooden rectangle and found it very wobbly? This is the same concept, just magnified a bit.
I don’t mean to be the bad guy, but would hate to see a fellow Jeeper end up hurt! The money you’re putting into the venture should allow you to cheap our on a primary safety point of the very center of your trip.
Hey Sam,
Thanks for the input. I built the cage like primarily that to get it out of the way.
Also remember there is no backseat in the Jeep, so I only have to worry about two people in the front in the event of a roll over.
As long as the front is a strong as stock, I think I’m good. I didn’t modify the front at all.
-Dan