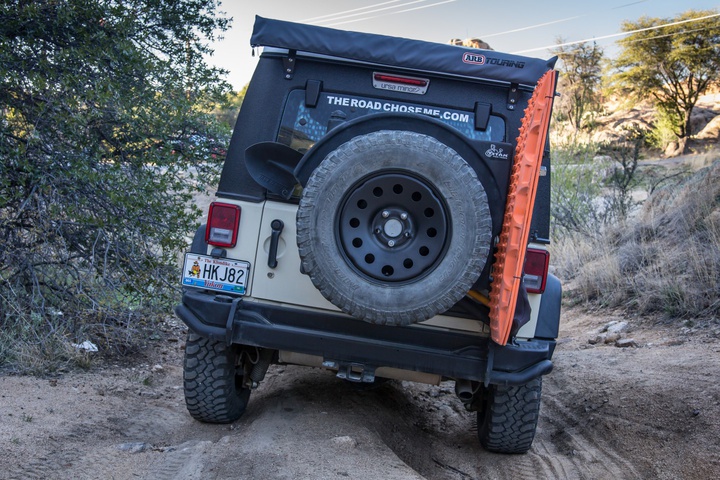
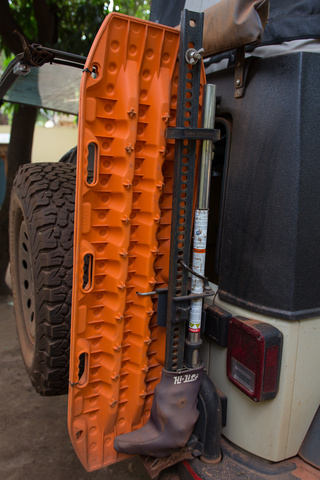
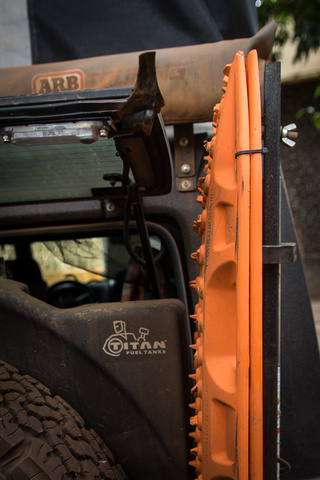
Carrying Maxtrax on a JK Wrangler can be a challenge. We need them to be easily accessible and outside so they don’t coat the interior in mud. Here’s how I mounted mine onto my AEV Rear Tire Carrier using the AEV Hi-Lift / Pull Pall Mount. Essentially, they sit where the Pull Pall would.
NOTES:
- If you have a massive spare tire clearance might be an issue. Check how much clearance you have between the Hi-Lift and the spare.
- The Maxtrax end up sitting a little below the height of the Hi-Lift – so they don’t add height to the Jeep. They protrude slightly further back than a 10.5 inch wide spare mounted to the AEV Tire Carrier, so they do make the Jeep longer overall, buy a couple of inches.
- Doing what I propose involves drilling a couple of holes in your Maxtrax. Maybe you don’t want to do that, I don’t know.
- If you don’t have a fuel caddy or Titan Transfer Tank, you can likely mount 4 Maxtrax, depending on the size of your spare tire.
- This DIY is specific to the AEV Tire Carrier and Hi Lift / Pull Pall mount. I’m sure you can make the same idea work on other tire carriers.
Things to buy:
- . Yep, you’ll need them if you want to mount them.
- An AEV Rear Tire Carrier, and an AEV Hi-Lift / Pull Pall Mount
- A . The Maxtrax will bolt to the jack, partially.
- A large 4 inch bolt, flat washer, lock washer and wing nut.
- A scrap of plastic hose, about 1/2 inch inner diameter, two inches long.
- (Optional) Something to lock it all on. I use a that uses the stock Jeep ignition key. It goes through the Maxtrax, Hi-Lift, carrier and my shovel.
Tools needed:
- A Sharpie to mark holes to drill.
- A drill and large drill bits (just to drill plastic, nothing serious).
- If you have a fuel caddy or Titan transfer tank, you might need something to grind a few nubs off the Maxtrax. See below for details.
Step 1:
Mount the AEV Rear Tire Carrier as per the instructions, then mount the AEV Hi-Lift / Pull Pall mount to it. Before you tighten down the mount, put the Hi-Lift in the mount, and open your tailgate all the way. Move the entire mount away from the spare tire until the high lift is almost touching the rear tail light, and wiggle the mount until the Hi-Lift is vertical.
Tighten it down.
Step 2:
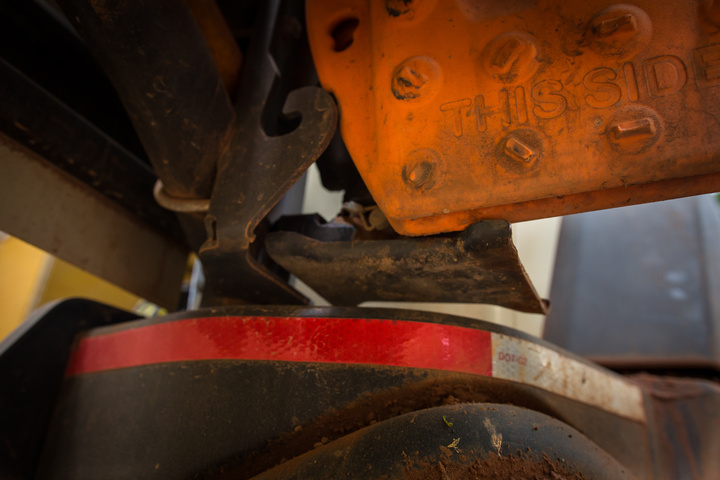
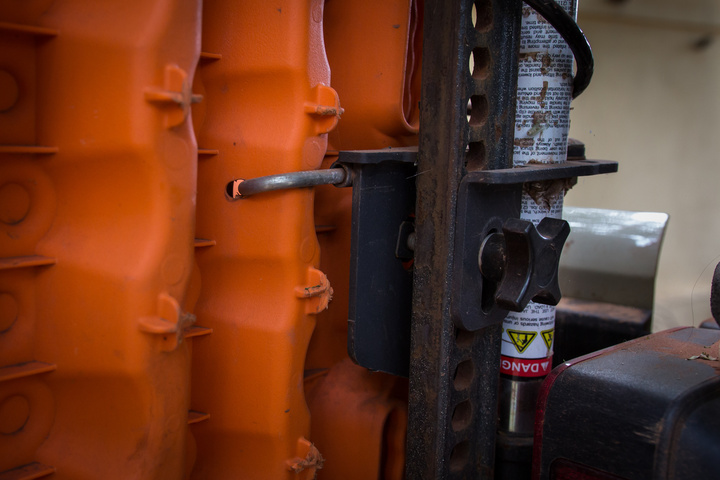
Remove the “hook” attachment from the middle of the Hi-Lift mount and set it aside. Sit the Maxtrax onto the mount – the bottom will sit on the foot of the Hi-Lift, and in the middle they will be in the “slot” designed for the Pull Pall.
Put the “hook” attachment back in, and draw a dot on the Maxtrax where it needs to go through.
Step 3:
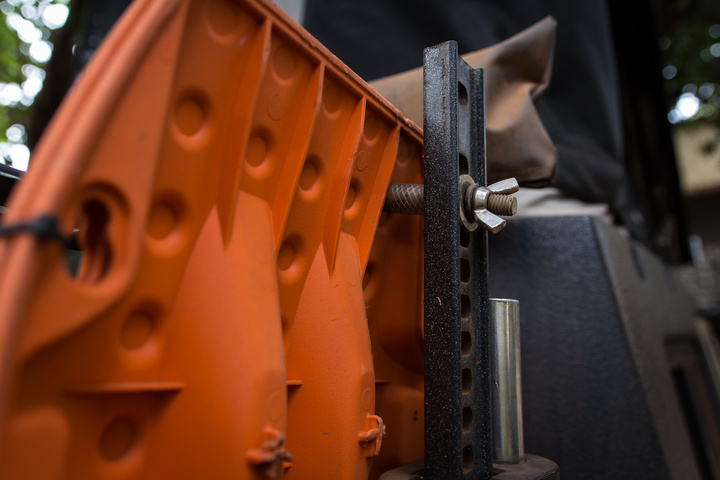
Drill a hole into the Maxtrax where the “hook” attachment goes through, on the ridges (see photo). Put them back on, and tighten down the “hook” attachment to lock them in place.
Near the top of the Maxtrax and Hi-Lift, mark a spot on the Maxtrax going through one of the holes in the Hi-Lift.
Step 4:
Take them off and drill another large hole where you just marked – big enough for your 4 inch bolt to pass through.
Step 5:
Put the Maxtrax back on, tighten the “hook” attachment first, then pass the large bolt through the Maxtrax. Put your scrap of hose between the Maxtrax and Hi-Lift (to stop them rattling around), then on the other side of the Hi-Lift put the flat washer, locking washer and tighten down the wing nut.
Step 6 (If you have a Fuel Caddy or Titan Transfer Tank):
If you have a Fuel Caddy or Titan Transfer Tank, clearance for the Maxtrax will be very tight. You might have to grind off a few of the nubs on the Maxtrax to make them fit. An angle or bench grinder works great for this.
All done, double check the two attachment points are tight after heavy washboard driving! (Mine have not come loose)
-Dan



Thanks for documenting all of your tips and tricks
merci de l information…
Did you use the Maxtrax much during your trips for recovery purposes?
Or did you find anything else they were useful for?
Just wondering, if you were starting again, would you still take them? Or rely on your winch instead?
I used them a couple of times and they were handy.
I’ll probably have a set on the new vehicle I’m about to start building.
-Dan
I can’t believe how lucky I am! I have the AEV bumper with the fuel caddy – you literally gave me step-by-step instructions to a perfect solution.
Great to hear Joe!